Crystal art, a mesmerizing blend of creativity and precision, offers a unique way to express artistic talent. This blog post aims to guide beginners through the intricate world of crystal art. We’ll cover essential tips and techniques, ensuring a smooth start for your crystal art journey.
Getting Started with Crystal Art

Choosing the Right Materials
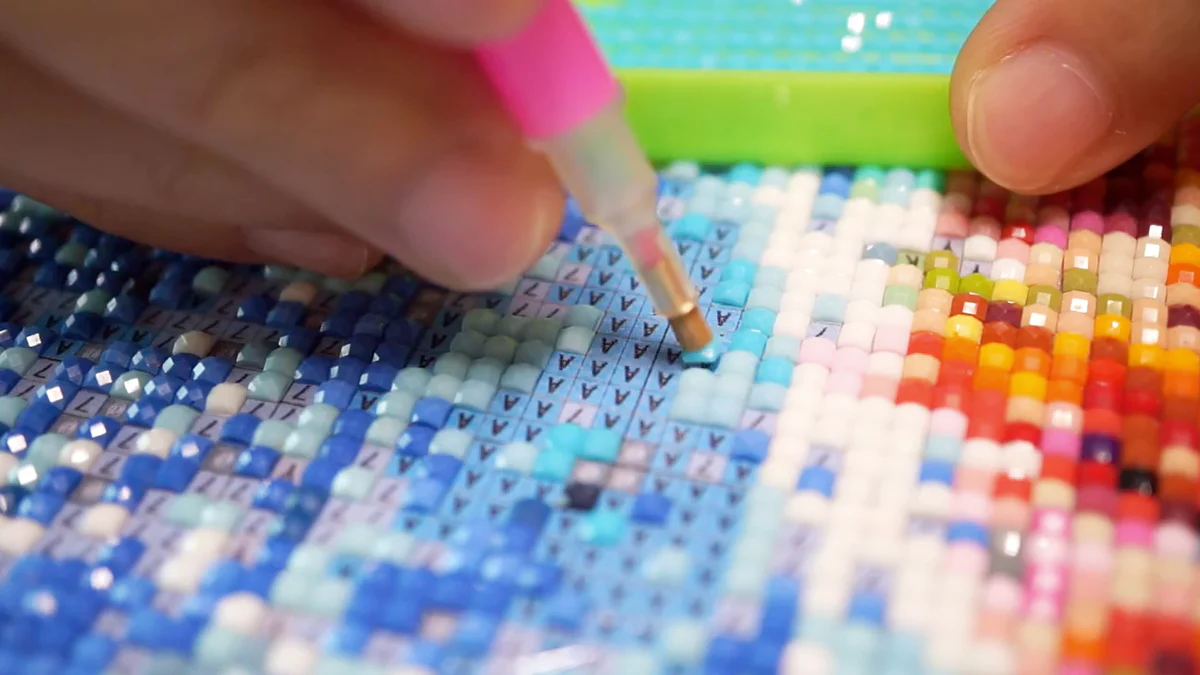
Choosing the right materials is fundamental and greatly impacts the outcome. Begin with a high-quality canvas that has a clear, adhesive surface and a well-printed design. This ensures ease of placement and longevity of your painting. Crystals or rhinestones are central to your project; opt for ones that are uniform in size and rich in color. A variety of sizes and colors adds depth to your work. The crystal applicator tool should be comfortable to hold and precise in picking up crystals. Don’t overlook the adhesive; it should be strong enough to hold the crystals securely without being overly messy. Investing in quality materials not only makes the process smoother but also elevates the overall aesthetic of your finished piece.
Preparing Your Workspace
Preparing your workspace is a crucial step. Start by choosing a well-lit area, as good lighting is essential for accurately placing crystals. Comfort is key, so ensure your chair and table are at a suitable height to avoid strain during long sessions. Organize your materials, arranging crystals by color and size for easy access. Keep your tools, like the applicator and adhesive, within reach to streamline the process. A clean, clutter-free space reduces distractions and enhances focus, making your experience more enjoyable and efficient.
Step-by-Step Guide to Creating Your First Piece
Understanding the Canvas and Design
Your canvas will have symbols or numbers corresponding to different crystal colors. Familiarize yourself with the pattern and layout. This understanding will make the process smoother and more enjoyable.
Applying the Crystals
Using the applicator tool, pick up a crystal, dab it in adhesive, and place it on the corresponding spot on the canvas. Start from one corner and work your way across to maintain consistency.
Tips for Perfect Placement
Ensuring Alignment and Spacing
Alignment is key in crystal art. Make sure each crystal is placed straight and close to its neighbors without overlapping. This precision ensures a uniform and professional-looking finish.
Dealing with Mistakes
Dealing with mistakes is part of the learning curve. If you misplace a crystal, gently remove it with tweezers and reposition it correctly. Embrace these errors as opportunities to improve your technique. Remember, perfection is not the goal; it’s about the journey and the joy of creating. Each mistake is a step towards mastery of this intricate form.
Advanced Techniques for Beginners
Mixing Colors and Textures
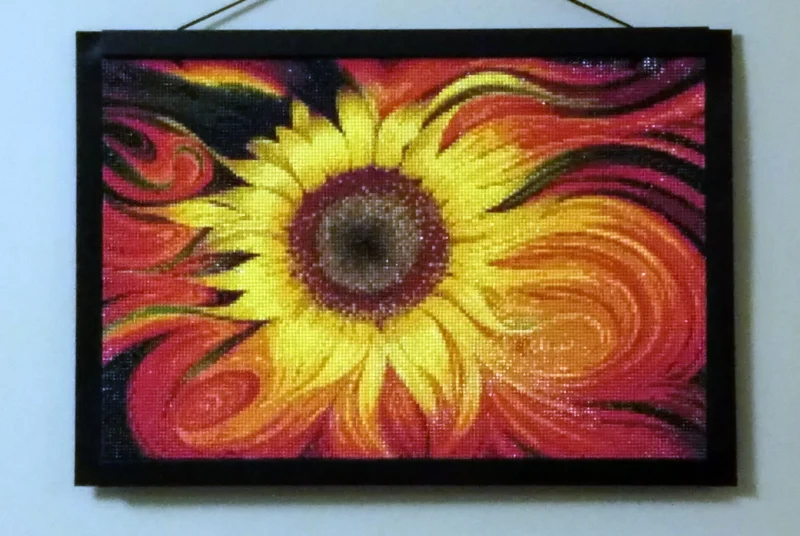
Mixing colors and textures elevates your projects, adding depth and visual interest. Experiment with a range of colors to create gradients or contrasts that bring your artwork to life. Incorporating different sizes and shapes can add texture, making your piece more tactile and visually dynamic. Don’t be afraid to blend unconventional color combinations or introduce varying finishes like matte, glossy, or iridescent crystals. This experimentation not only enhances the aesthetic appeal but also allows you to develop a unique style. Mixing colors and textures is an exciting way to explore your creativity and make each piece distinctly yours.
Creating Custom Designs
Creating custom designs allows for personal expression and unique creativity. Begin by sketching your design or using a software tool for precision. Choose a theme that resonates with you, whether it’s abstract patterns, landscapes, or portraits. For inspiration or starting points, exploring a big collection here can be immensely helpful. Select a color palette that complements your design, considering various shades and sizes for depth and texture. Transfer your design onto a blank canvas using a grid system for accuracy. This step requires patience and attention to detail. Custom designs transform crystal art from a hobby into a deeply personal art form, reflecting your style and imagination in each sparkling piece.
Maintenance and Display
Protecting Your Finished Piece
Protecting your finished piece is essential to preserve its beauty and longevity. After completing your work, gently clean the surface to remove any dust or residue. Applying a clear sealant can provide an additional layer of protection, helping to secure the crystals and prevent fading. Be cautious with the type of sealant used to ensure it doesn’t affect the crystals’ shine. Store or display the artwork in a place safe from direct sunlight and extreme temperatures, as these can cause the adhesive to weaken and the colors to fade. Proper protection keeps it vibrant and enduring for years to come.
Displaying Your Artwork
Displaying your artwork is a rewarding aspect, showcasing your effort and creativity. When choosing a display location, consider lighting; natural light or spotlights can enhance the sparkle. Think about the background and surrounding decor to ensure your artwork stands out without clashing. Framing your piece adds a professional touch and protects it from dust and damage. Consider using a shadow box frame to accommodate the texture and depth. When hanging, ensure the spot is secure and visible, turning your artwork into a focal point of the room.
Overcoming Challenges
Handling Complex Patterns
As you progress in art, you’ll encounter more complex patterns and designs. These can be intimidating at first, but with practice, they become manageable. Start by breaking down the design into smaller sections, tackling one area at a time. This approach helps maintain focus and reduces overwhelm.
Managing Time and Expectations
The creation of elaborate motifs can take a lot of time. For your project, set reasonable objectives and practice good time management. Recall that the process of creating is just as beautiful as the final piece. Take your time and relish every creative moment; don’t rush it.
Conclusion
A voyage of care, accuracy, and originality, crystal art is more than just making stunning objects. As a novice, accept the process of learning and savor the delight of producing something genuinely original. Keep in mind that placing a crystal is a step towards mastering this fascinating art form. Happy creating!